Build a Birdhouse!
Follow the steps below to build your very own birdhouse! But don't forget, this is a project that will require the help of an adult!
- Pick your birdhouse design. There are many sources online that show plans and design ideas. Do not be afraid to make the house unique! Pick one that you think is fun and exciting to build.
- Choose from a variety of materials for your roof and measure up! Your roof can be a found object or something manufactured. For my bird house, I chose a license plate for a roof. That dictates how wide my house can be. You want there to be an overhang on the front to help block some rain. To find the side width, measure your roof. Then, subtract twice the thickness of your board. After that, subtract another ½” for the overhang. The remainder should be the width of your sides.
- Select the rest of your material. Simple lumber will work fine for this. For my bird house, I choose a 1x6x8’. That way I could have extra material. Pallets would be a fine source for material and can be found for free.
- Choose your height. Use a ruler to measure how tall you want your bird house to be. Make a mark to show the height.
- Measure and mark. Now, use a straight edge to mark the slope of your roof. Do this by finding the center of your board at the peak where you marked it before. Measure down on the sides as far as you would like. I marked 45 degrees from the center using a speed square. You will copy this piece to make the back. The height of the sides of your bird house is determined by the bottom of your roof line. The bottom of your bird house is easy to measure after the front and back are attached to the sides.

- Lay out your cuts. When I am painting a project, I will often use a thicker marker to lay out my pieces.
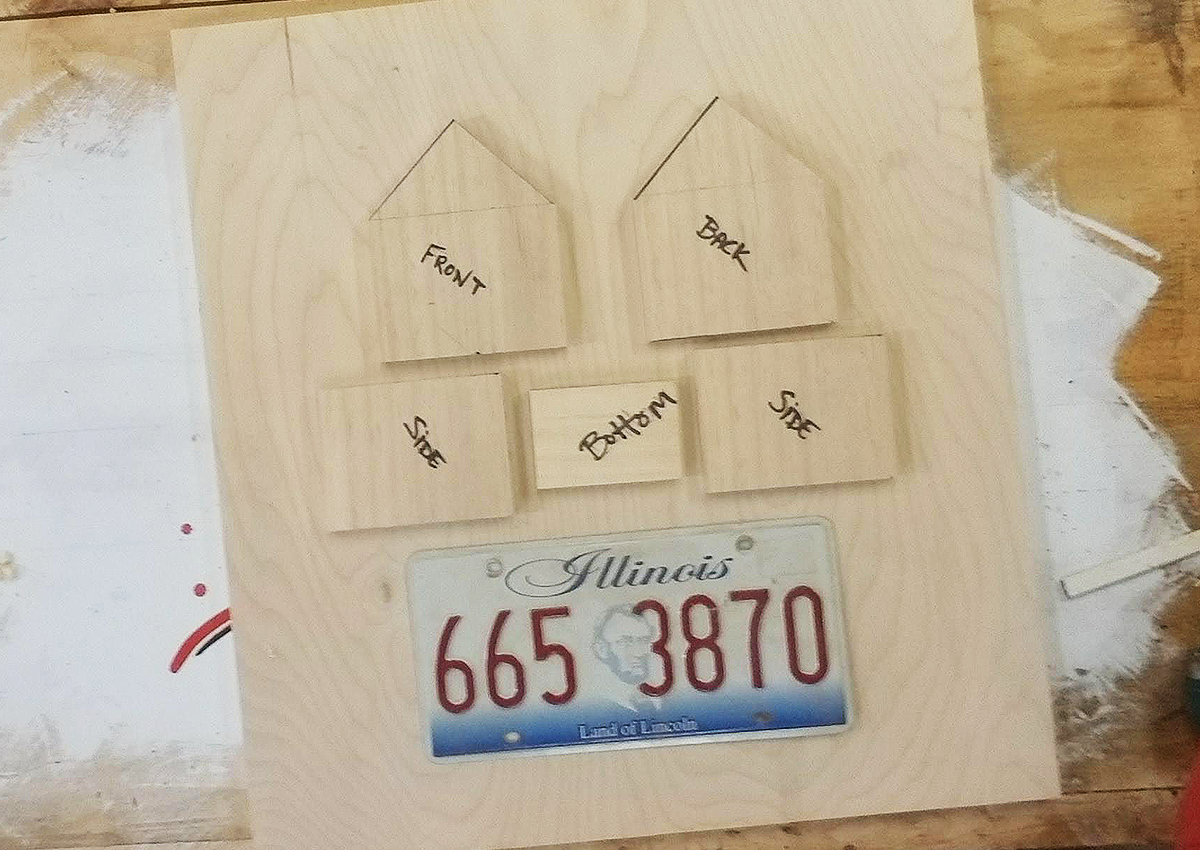
- Time to cut out your side pieces. Have an adult help! Cut along your markings with a hand saw. This project can be made with an inexpensive miter box. They often come with a saw. When you are done cutting, you should have a front, back, and two sides.
- Assemble. Pre-drill holes, and attach the front pieces to the side pieces, followed by the back. Having an extra couple of hands can be helpful with this. Use common nails - 1¼” should work fine. I added some wood glue to mine for extra strength.

- Attach the bottom. Once that is complete, measure the opening for the bottom. For mine, I used a solid bottom. You can use a solid piece, or you could attach screen to the underside. Either way, make sure there is drainage through the bottom. Attach your bottom by driving nails through the sides.

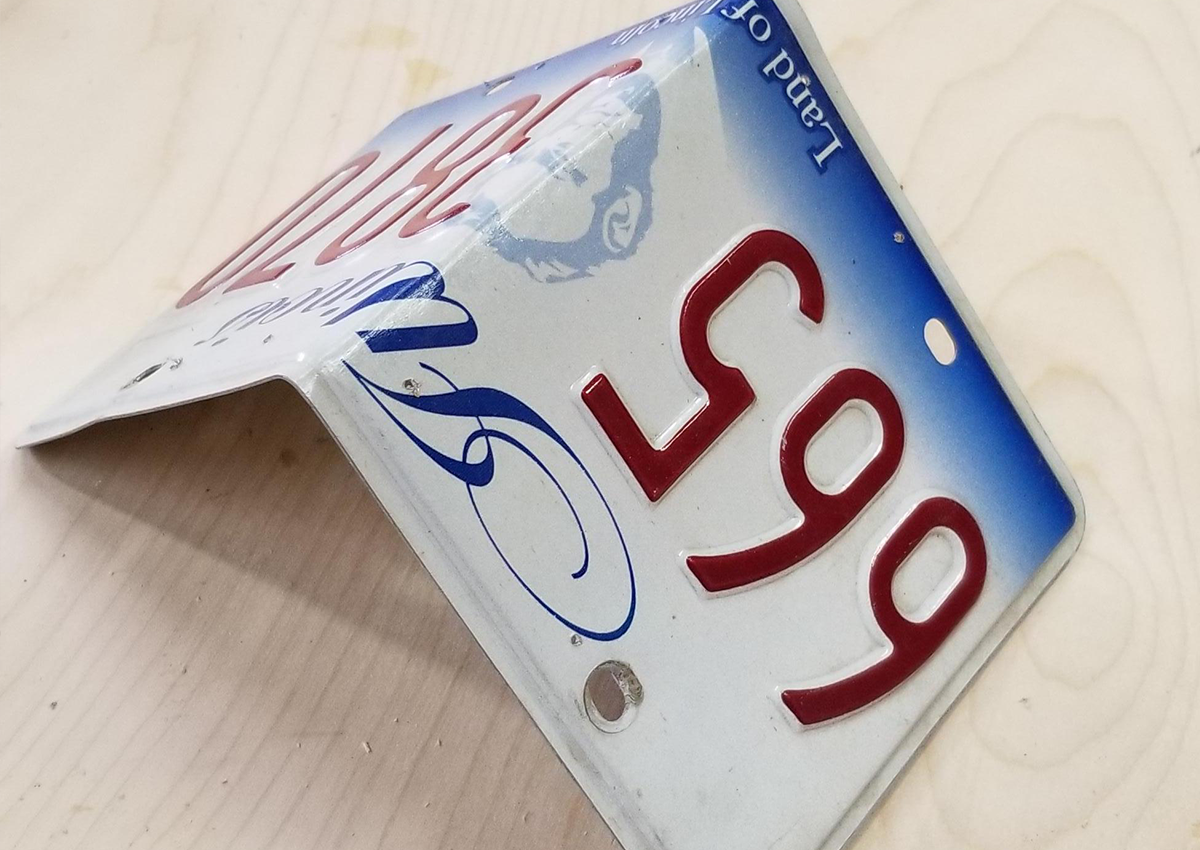
- Make your roof. If applicable, find the center of your roof and bend it short ways. Make the bend sharp so there are less gaps.
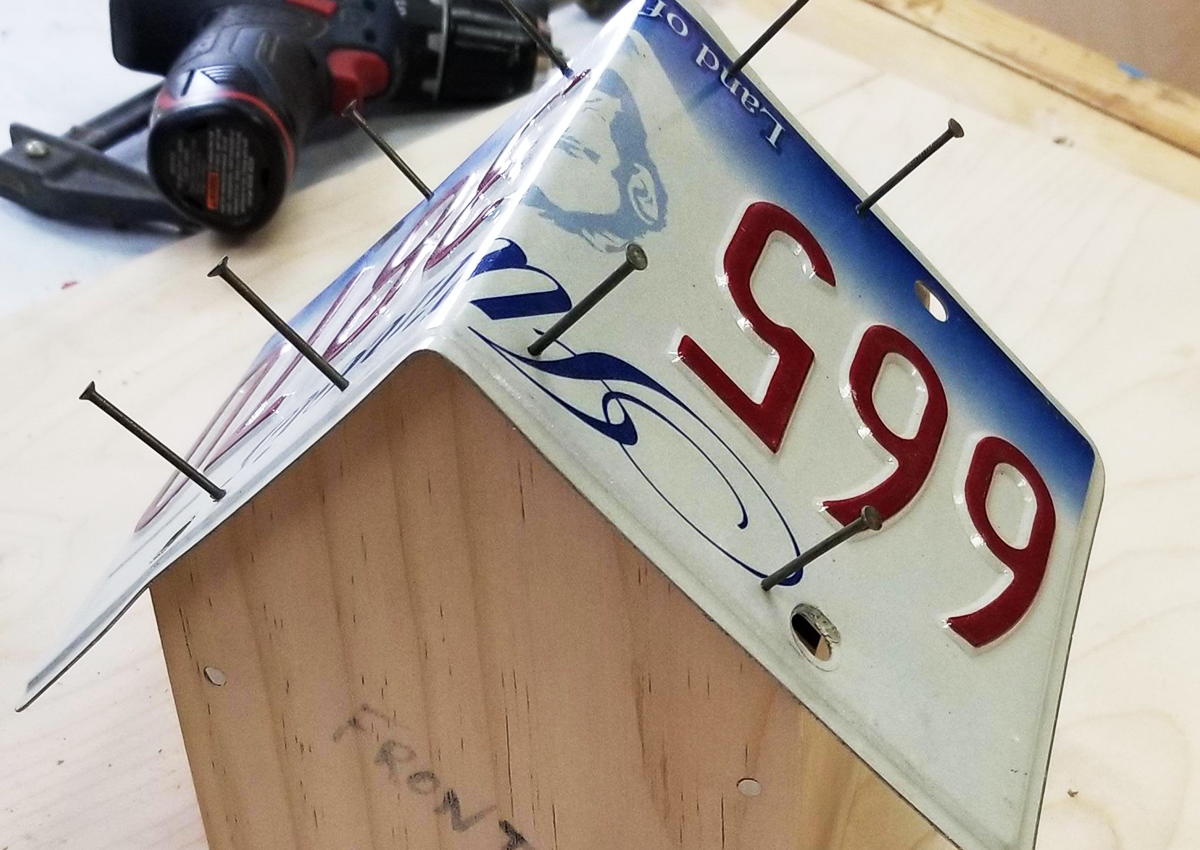
- Finish your roof. It helps to start drilling holes through your roof, before it is on the house. Nail the roof to the house, making sure that it is flush against the back and overhangs the front. It should now look like a house.
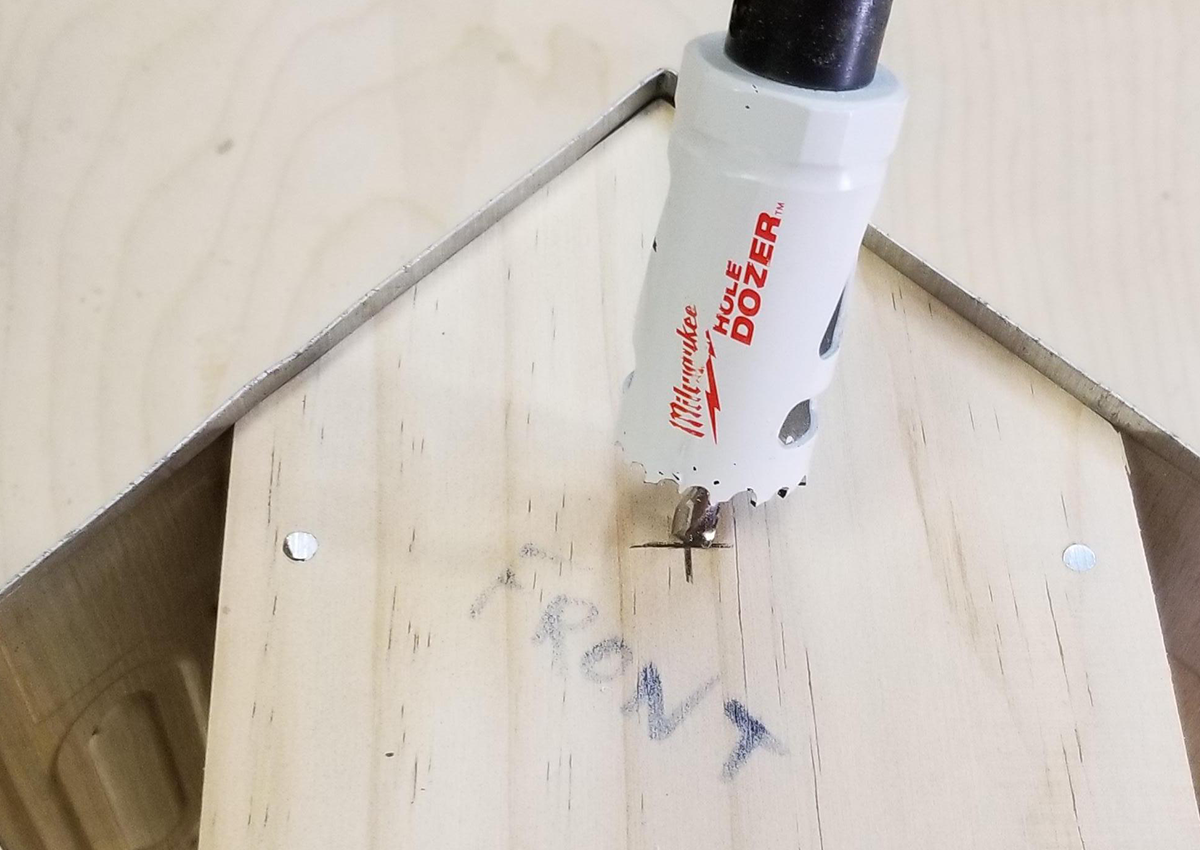
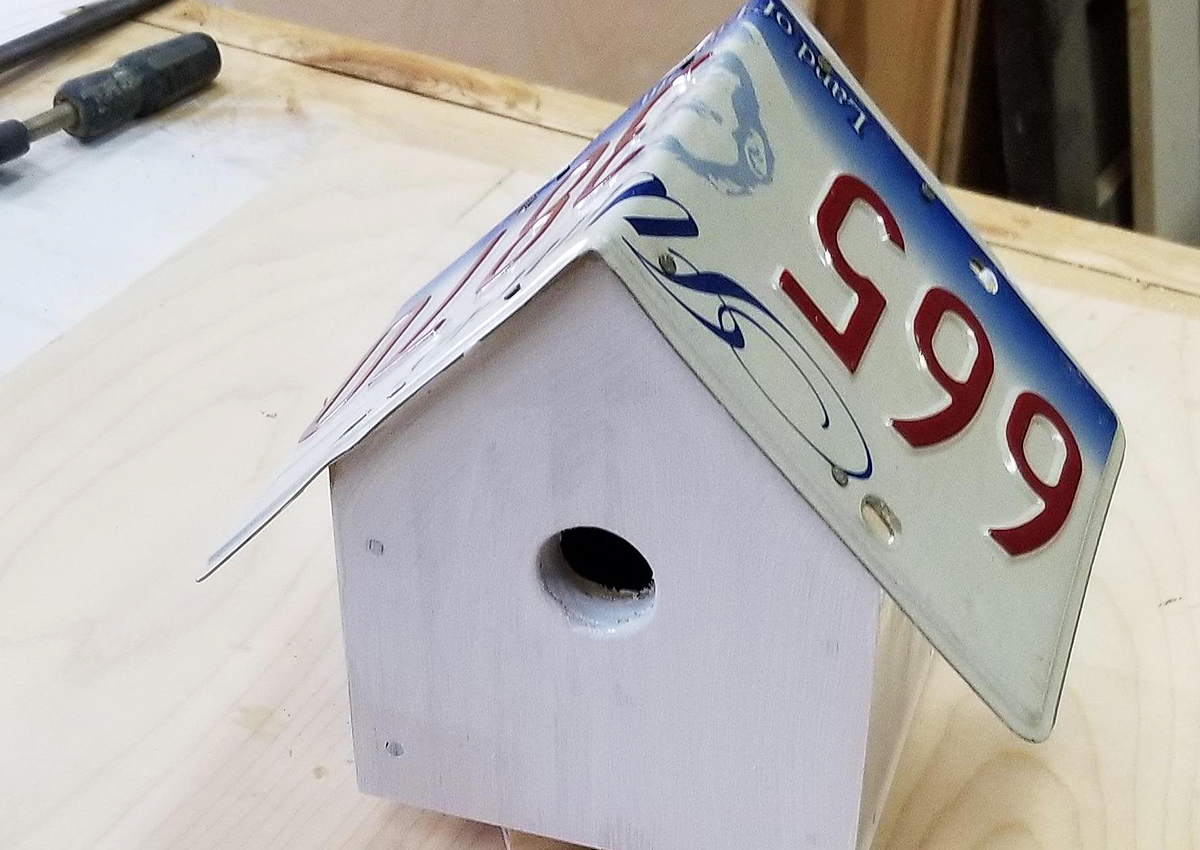
- Drill your entrance hole. Remember that different birds use different sized holes. I used a 1 ¼” hole saw to cut my entrance. You could use a variety of bits or saws to make the hole.
- Choose your color! Paint your birdhouse with your choice of exterior paint.
- Hang your birdhouse. The easiest way I have found to hang these houses is to attach them to posts by driving a screw through the back. I made mine so I could use a screwdriver through the entrance to drive the screw through the back.

- Enjoy watching the wildlife!
